Anonymous-0
Well-known Member
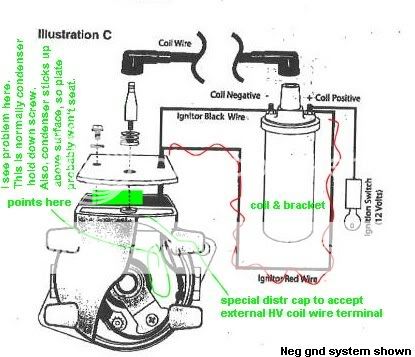
I switched my front mount 8N to 12V several years ago and at the time for monetary reasons, I used a 12V to 6V resistor and the stock ballast resistor w/6V coil rather than buying a 12V square coil. I would like to "finish" the conversion by putting a 12V coil on and removing the resistors. Will the square 12V coils stand up to the alternator current? I've read they aren't up to it without some resistance inline. I would really like to use a round auto type coil and be done with those square ones, but the "gut the old one" seams to be the only method going and from what I read there are a lot of the newer one that aren't "gutable"? Any other methods for this out there? any advice/info welcome.